In 2015, my church decided to revive their Fun Fair event. They encouraged folks to take a look at some of the old games and refurbish them if they were interested. I found an old game called “Dunk It”. It consisted of a toilet seat bolted to a green wooden frame. The goal was to toss a roll of toilet paper through the hole of the toilet seat to win a prize.
My inner 5yo. thought this would be my game. But, I couldn’t just leave it as is. I needed to make some… improvements. The premise of the game was simple, but it lacked something. There was no feedback for the player. So, I set out to give it a voice.
My first inclination was to use an Arduino with an audio shield. However, I was trying to minimize the cost, so I thought I’d use something I already had on hand, a Rapsberry Pi A+. This would handle the audio, and the programming would be relatively simple.
Alpha/Beta Version
To prove the concept, I thought I would wire up a light sensor (Light-dependent Resistor) to the Raspberry Pi. This was not as straightforward as I’d hoped, since LDRs are analog devices and the RPi only has digital I/O pins. So, after a bit of searching, I found a technique to read analog values from a digital I/O pin using a simple circuit.
Once I got this wired up, I stole some code to make the LDR reading work. I combined that with some code to play back audio and the alpha version was working…
Version 1.0
I foolishly ignored the advice to always put a resistor in series with an LED. And it bit me in the behind. An hour before the fun fair, the LED blew out, and I wasn’t able to leave and get a replacement. Lesson learned.
Version 2.0
For Version 2.0, I wanted to make some significant improvements. First, I wanted to make a more realistic “experience” for the players. I was able to secure a toilet on freecycle (I love freecycle). After sanitizing it, I set to work wiring up the LED in the bottom of the bowl. This had the added benefit of making the code simpler.
I also wanted to improve the sound for the game, so I got an inexpensive power amp and car speakers. I mounted the speakers on the snazzy new platform with locking casters. This made the whole thing much easier to move around.
Version 3.0
For version 3.0, I wanted to clean things up significantly, and make it easier to assemble/disassemble. I mounted the amp and Raspberry Pi on a board, that attaches to the inside of the tank with Velcro. I also used a connector for the sensor instead of being wired to the board.
I wired up the circuit on a proto hat and added a connector for the LDR so that it was easier to connect/disconnectWhat toilet wouldn’t benefit from a debug monitor and keyboard?
Version 3.1
I added a shutdown button for the system so the SD card doesn’t get trashed, and the Pi shuts down gracefully. and covered the wires with some flexible split tubing. I also added some code to avoid repeating the audio if the sensor detected darkness at the end of the previous audio playback. Finally, I added some other… apropos sounds.
I bet this is the first time the words “graceful” and “toilet” appear in the same context.
I added a shutdown button. This puts my mind at ease by gracefully shutting down the Pi.
Possible Improvements:
I’d like to use the flush handle to perform the shutdown/recalibration
When I was a kid I got an Aria Pro II XR Series Electric guitar as a gift from my parents. The mists of time prevent me from recalling if it was for my birthday or Christmas or some combination of the two, but I’m fairly certain that it was 1989.
Christmas or Birthday? Please excuse the mullet. Identity masked to protect the guilty.
I played the heck out of that guitar for many years, and it has moved with me everywhere I’ve gone. After our first daughter was born, I didn’t play very much at all and it languished until recently. I got back into playing a few years ago, and longed for a new guitar. I finally got that new guitar and passed on the Aria Pro to my older daughter. She liked it, but said that she’d like to have a blue guitar. That was exactly what I wanted to hear! I’d been contemplating modding a guitar for ages, and this was the perfect excuse to try it out. We decided to refinish it, upgrade some of the hardware, and maybe even audition some different pickups. Before tearing it apart, I thought I’d take some commemorative photos!
I’ve always liked the headstock on this guitar. Perhaps not the best mechanical design, but it looks cool!The lack of a pickguard adds to the minimal aesthetic of this guitar. One of the things I dislike about low quality tremolo systems is that they are a pain to tune and keep in tune. After finally paying for a decent setup several years ago, this tremolo was tamed for the most part.Not the best design for easy access to the upper frets, but I never play up there anyway.I’ve always appreciated the clean lines and simple arrangement of this guitar. Also, it’s black.
Step 1: Disassembly
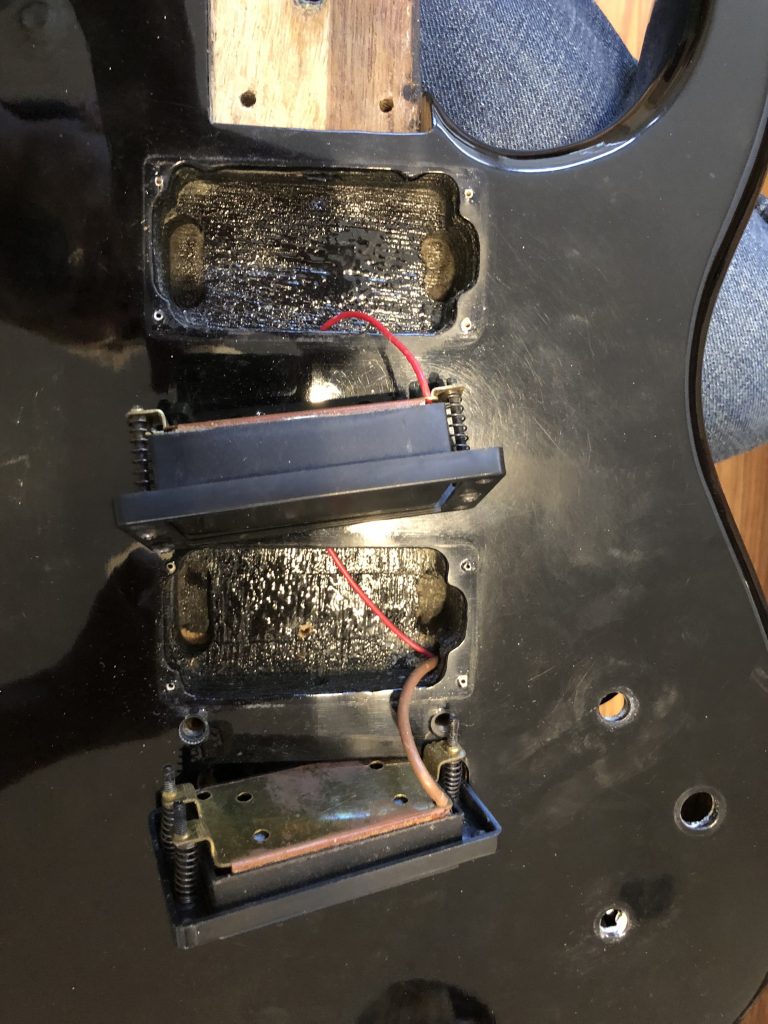
To refinish the body, we needed to remove all the electronics, plastic covers, hardware and the neck. This was the easy part!
Korean electronic components!These knobs had no set screw. I found this tip online. Use a pair of spoons to gently lever the knob from both sides. Worked like a charm!The wiring for the pickups is nice and tidy. Almost a shame to remove themall components removedAn empty husk
Step 2: Remove the finish
After reading a few different posts about refinishing late ’80s Korean guitars, I decided it’s probably safe to try the heatgun + paint scraper technique. I had no idea what to expect, but read several posts indicating that this vintage of low-cost guitars would likely have a laminate body. I was hoping that there would at least be some semblance of an interesting grain to the revealed surface. There’s only one way to find out, I suppose!
I normally don’t like either of these types of tools anywhere near my guitar
As it turns out, there was a thick coat of finish on top of the wood, then a layer of paint, and then a protective layer over the paint. Removing all of this revealed a somewhat porous laminate beneath. The layers of the laminate are about 1/16″ thick each, and actually revealed a very interesting pattern at the contours of the body. The top layer itself wasn’t particularly interesting, but that’s okay, since the laser-etched images should give it some visual interest.
I guess it takes a LOT of finish to smooth out the laminate bodies. That stuff is thick!Unfortunately, I let the heat gun linger too long in a few places and ended up with several scorch marks. I was able to remove most of it with some careful sanding, but not completely.
Once the finish was completely removed, I set to work with the random orbital sander to get a nice smooth finish. I ended up with 300grit or so, and that gave a nice, almost glassy smooth sheen to the wood. I was able to remove much of the scorch marks caused by incautious use of the heatgun.
I think the way the countours expose the laminate layers is really interesting!
Step 3: Frickin’ Lasers
Not content with a plain design, I asked my daughter if she wanted to put any custom designs on the guitar. Of course she did! So she set about drawing a few things she wanted on the guitar. She said sloths and cats had to be involved. In our search for ideas, we came upon an adorable image of a sloth hugging a cat, and she had to have it. She then drew her own sloth and a cat from her favorite book series at the time, Warriors.
we played around with the size and layout of the custom designs.
After drawing them up, we scanned the images and tested them on some scrap material to make sure we liked the results
Aw, so cute!Since the wood is denser than the MDF, the detail isn’t as pronounced, but it’s still cute!I believe this is “Jayfeather”That’s one hungry sloth.We were happy with the placement. Luckily, it didn’t require high precision for the placement.
Step 4: The Headstock
I wanted to really personalize the guitar, so I decided we should “rebrand” it. First, I sanded off enough of the finish to remove the paint and the logo.
It didn’t take long to sand down just enough to get rid of the old decal and the paint layer
I then took the Epiphone logo and played around with it in the Gimp and came up with this:
Working with the waterslide decal reminded me of the decals that came with airplane models from the ’80s!
Step 5: Re-finish
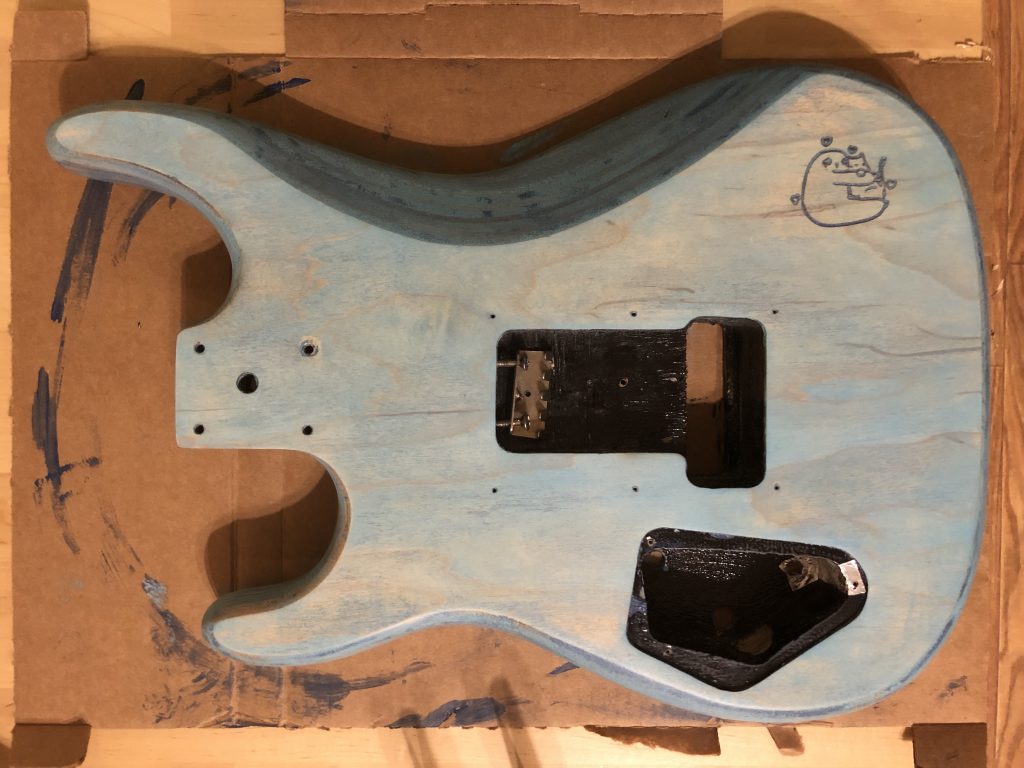
One of the goals of this project was to have a nice finish that was easy to apply and didn’t require a lot of equipment. I opted for tung oil, as I like the look and feel of the oil finish, and it can be applied by hand with good results. As for the new color, we originally chose a deeper blue, but found that it was too dark and didn’t seem to want to stick to the wood. We removed most of that darker blue, leaving traces of it behind for visual interest and tried a much lighter, transparent antique blue. This was a much more pleasing result.
This stain was too dark, and didn’t show much of the wood.
This stain was less heavy-handed and what little character the wood has is visible. We left some remnants of the darker stain to give it some variation in appearance.
After settling the stain issue, it was time to apply the tung oil. I think we applied 9 coats of tung oil. It really started to get a nice soft shine after about 4-5 coats.
Step 6: Re-Assembly and Upgrades!
So, this was the hard part. Getting all that stuff put in place and working properly is always a challenge for me. I tend to get myself into trouble by not documenting things as I take them apart. I was careful to avoid that mistake this time.
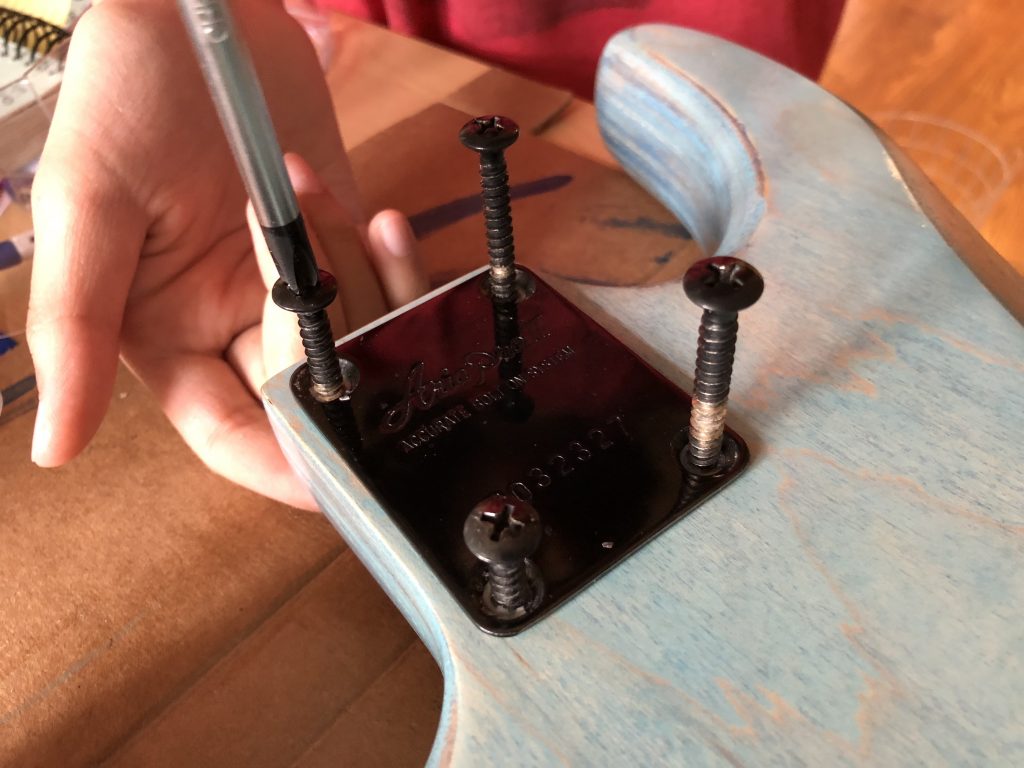
I screwed in the neck bolts until they just poked out of the body. Then I attached the neck and completed the assembly.so cute! The black hardware actually looks decent with the lighter blue finish.And, it’s done!
I’m not the best with a soldering iron (working on it, though), but it appears that I got all the connections together correctly. The guitar makes sound and it sounds like a guitar. I consider that a win.
I took this opportunity to do a few upgrades. I wanted to improve a few things. Firstly, this guitar broke a lot of strings. Like a ridiculous amount. Long ago, I suspected that the poor quality nut and bridge saddles contributed to the problem. During disassembly, I happened to break the nut, so I needed to replace it anyway. So, I ordered a Graph Tech Tusq nut and a set of their String Saver saddles.
The old saddles had a sharper break angle, and the set screws scratched my hands.The Graphtec saddles have a smoother break with a rounded channel and the set screws are flush or nearly so. Much more comfortable, and we have not broken any strings since.
I also noticed that the tremolo springs ring while playing, so I replaced them with some noiseless springs that are wrapped in plastic of some kind. Lastly, I wanted to install locking tuners, but they are rather expensive. After some digging, I stumbled upon these Wilkinson locking tuners. They’re pretty ingenious, effective, and best of all, inexpensive.
How’s It Sound?
Unsurprisingly, it sounds pretty much the same as before. We didn’t end up changing the pickups yet. But for the curious, here’s what a late ’80s Korean low-cost guitar sounds like
What’s Next?
Well, we have a few pickups lying around that we might try out, but honestly, there’s not a lot more we want to change. The one thing I’d love to do is remove the tremolo system and replace it with a fixed bridge. But, due to the nature of the tremolo design, there isn’t a good way to make the conversion.